How to set up a Brother QL-820NWB printer and connect to a Bluetooth? OR What are the steps for Brother QL-820NWB Printer Bluetooth Setup?
Follow the below steps to connect a Brother QL-820NWB Printer to your device via Bluetooth.
Unboxing and Primary Configuration of the Printer
1. Remove the packaging and take the printer out. Now follow these steps.
2. Gather and insert the roll of badges into the printer. CoReceptionist offers various configurations for the printing rolls.
3. Plug the black power cord’s one end into the printer and other in the power socket.
4. Turn on the printer by pressing the power button. The green status light will pop up.
Turn on the printer by pressing the power button. The green status light will pop up.
5. Use the arrows [▲], [▼] and ‘OK’ buttons to set your language, the time and date.
6. If you’re not already on the main screen, navigate using the ‘MENU’ button.
7. Use the [▲] and [▼] buttons to select Template Settings. Set Template Mode to OFF.

8. Navigate to the main screen using the ‘MENU’ button.
9. Using the [▲] and [▼] button select ‘Settings’>‘Auto Power Off’ > to turn Adapter OFF

10. Press the ‘back’ button.
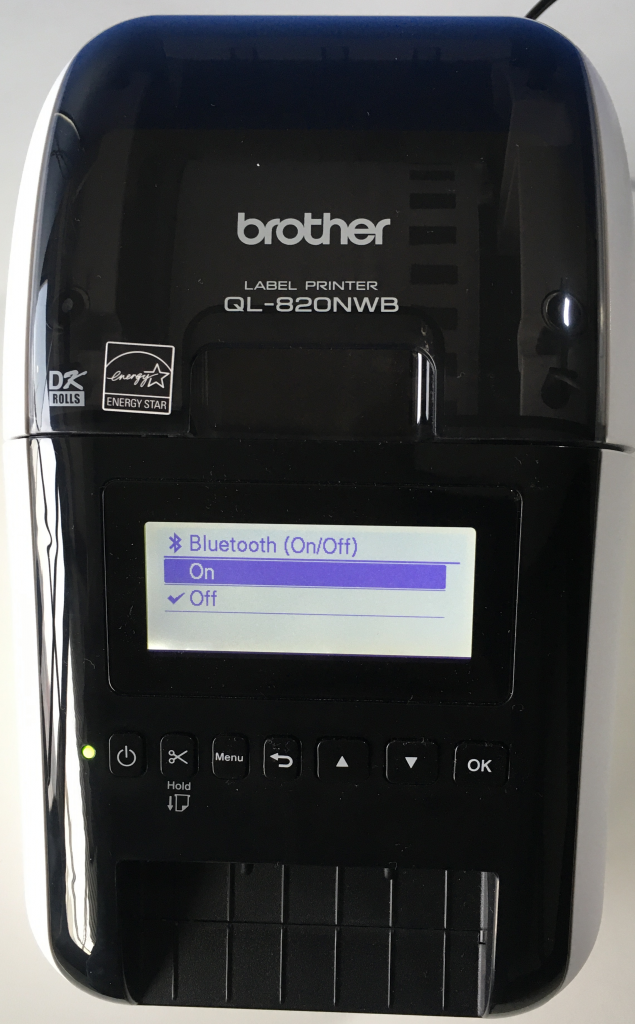
Connect to Bluetooth
1. Use the [▲] and [▼] buttons to select BLUETOOTH > BLUETOOTH (On/Off) > On in the settings menu. Press ‘OK’.
2. Use the [▲] and [▼] buttons to select BLUETOOTH> Automatic Reconnection (On/Off)>On in the settings menu. Press ‘OK’
3. On your iPad, go to Settings app> Bluetooth Settings. The Printer name shall appear in the devices section.

4. You will now need to configure CoReceptionist for iPad to interact with your printer. Open CoReceptionist App, long press and hold the CoReceptionist logo to go to hidden settings.
5. Enter your password to confirm your identity as an account administrator (This applies if your company has requested to set up a password, otherwise you can continue without one). The iPad will then show the printer paired previously.
Tap on ‘PRINT’ to check if the iPad can communicate with the printer. You might face a few issues that may pop up at this stage:

- If you receive a “Wrong Label” error message, you have to recheck on the label model that you selected at step 2 of this guide.
On the completion of a successful test run, tap on the ‘<‘ button in the top left corner. Exit screen by hitting ‘X‘ in the upper left. The changes will be saved automatically.
For other queries, custom solutions and help give us a call on +1 508-921-0143


